

Geothermal Heating and Cooling System Operation and Installation Process

Step 1 – Geothermal System Selection and Analysis
Selecting the right heating and cooling equipment for your home can be confusing. Beware of contractors that may try to sell you Geothermal Systems with more capacity then you need. Even though more capacity sounds like a good thing, a system that is too big for your home will heat and cool too quickly leading to short cycling. The short cycling can lead to wear and tear on the system, inadequate dehumidification and reduced product lifespan.
Before any new equipment is recommended for your home, we will perform a careful analysis of your home's heating and cooling requirements, after which we can determine the optimum equipment capabilities and energy-efficiency ratings to give you the best return on your system.
As your professional Geothermal Heating and Cooling System experts, we take time to explain, choose and design the right type of equipment depending on three key variables:
- 1. The number of heating and cooling hours required for your home
- 2. The size and thermal efficiency of your home
- 3. The cost of fuel in your area
Based on these variables our geothermal experts will analyze your comfort needs and recommend the optimum equipment necessary to give you the best system performance, efficiency and return on your investment.
Geothermal System Primary Components
A Home's Geothermal System typically consists of several key elements, including:
- Buried Underground Plastic Pipe Loops
- Liquid Antifreeze Solution in the Underground Piping
- Heat Pump
- Air Distribution System
Step 2 – Geothermal Loop Installation
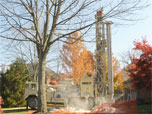
The First Step of the System Installation Process is to bury the Geothermal Loops in the ground in a vertical or horizontal position near your home. The optimal position of the loops will be determined based on the surroundings of your home.
After the Geothermal System design process, holes are buried in the ground to the determined depth based on your home ground conditions and several loops are installed to the proper depth.
Step 3 – Connecting Geothermal Loops to Home Module
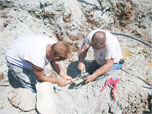
After installation of the Geothermal Loops, they are connected to the pumping module inside your home.
Step 4 – Installation of the Air Handling Cabinet
The air handling cabinet can be a free standing cabinet in your home or part of the geothermal heat pump cabinet. This system also includes the blower assembly that forces air through the ductwork of your home.
Step 5 – Liquid Solution Addition to the Geothermal System
The pumping module then circulates the water and antifreeze mixture through the buried underground loops where they absorb the heat from earth in the winter month and release the excess heat from your home in the summer months.
Step 6 – Heating and Cooling your Home
In the winter months, after the heated liquid reaches your home system, the heat pump then multiplies the heat and uses it to warm your home with help of the blower.
In the summer months, heat circulating out of your home is extracted and released into the coolant liquid, and is then transferred into the cooler ground. These two cycles are why geothermal heating and cooling is classified as a renewable energy source.
Geothermal System Installation Video